To replace rocker panels on a car, first, remove the damaged panel and then weld or rivet the new one in place. Ensuring your vehicle remains rust-free and structurally sound involves regular maintenance, with special attention to areas prone to damage, like rocker panels.
These components play a crucial role in the structural integrity of your car, acting as the foundational support in the event of a side impact. Over time, exposure to elements such as water, salt, and dirt can lead to corrosion, compromising the vehicle's safety and aesthetics.
Tackling rocker panel replacement might seem daunting, but it's a manageable task with the right tools and guidance. This process not only restores your car's appearance but also prevents further damage and maintains its value. By addressing this issue promptly, car owners can ensure their vehicle remains reliable, safe, and visually appealing for years to come.
Introduction To Rocker Panel Replacement
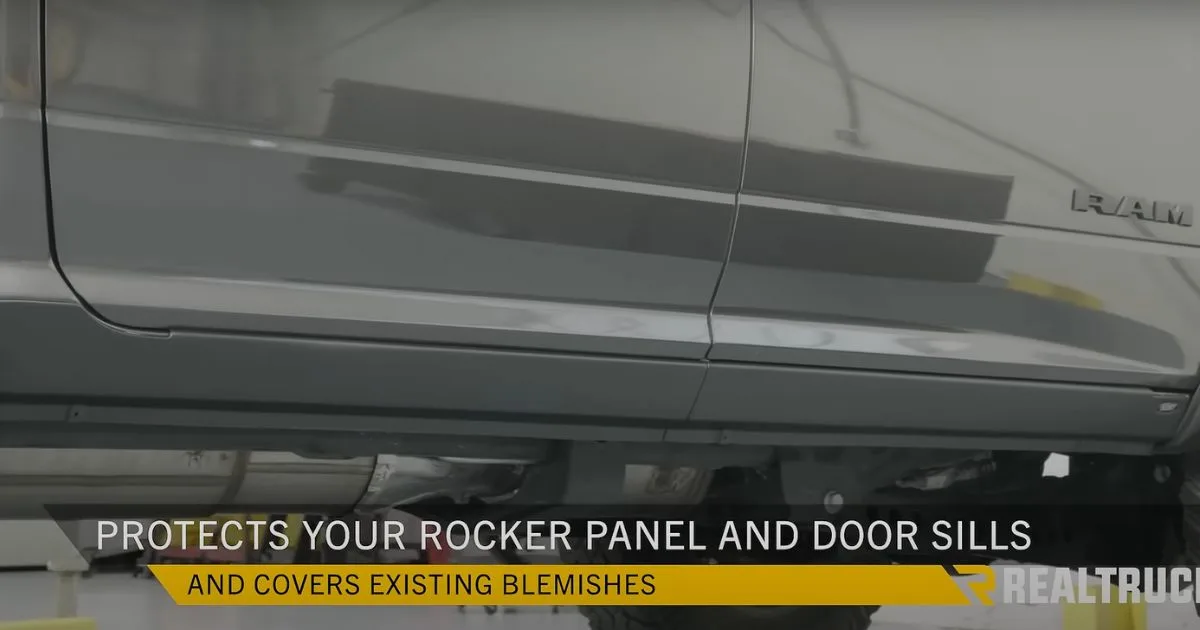
Rocker panels are key components of your car's structure. They run along the underside of your vehicle's doors. These panels add rigidity to the body. They help protect against impact. Over time, rocker panels can suffer from rust, damage, or wear. Replacing them restores vehicle integrity. It ensures safety. This guide walks through the basics of rocker panel replacement.
The Role Of Rocker Panels In Vehicle Integrity
Rocker panels contribute to the overall strength of a car. They support the vehicle's weight. They maintain the structural integrity. In an accident, they help distribute force. This protects passengers. Without solid rocker panels, a car's safety is compromised. The vehicle's frame can also warp. This makes doors and windows not align properly.
Signs That Indicate A Need For Replacement
- Rust: Brown spots or holes on the panel surface.
- Damage: Dents or bends from impacts or accidents.
- Weakness: Unusual flexing or bending when pressed.
- Water leaks: Moisture inside the car near the panels.
 Tools And Materials Required
Tools And Materials Required
Embarking on a DIY car repair project requires the right set of tools and materials. Replacing rocker panels is no exception. Before you begin, gather all necessary items to ensure a smooth and efficient process. This guide outlines everything you need for the job.
Essential Tools For The Job
Equip yourself with these tools:
- Welder - Binds the new panels to your car.
- Grinder - Removes rust and smoothens edges.
- Hammer and Dolly - Shape metal accurately.
- Drill - Prepares for screws or rivets.
- Screwdrivers - Assists in removal and installation.
- Protective Gear - Keeps you safe.
Choosing The Right Replacement Panels
Select panels that fit perfectly:
- Match your car's make, model, and year.
- Opt for quality materials like thick steel.
- Check for pre-formed or flat options.
| Item | Quantity | Note |
|---|---|---|
| Replacement Rocker Panels | 2 | One for each side |
| Primer | 1 can | Prevents rust |
| Paint | As needed | Matches car color |
| Sealant | 1 tube | Seals against moisture |
 Preparing Your Workspace
Preparing Your Workspace
Before diving into the task of replacing rocker panels, it's crucial to prepare your workspace. A well-organized area ensures safety and efficiency. It helps prevent accidents and makes the job smoother. Let's set up your workspace with care.
Safety First: Protective Gear And Precautions
Safety is paramount when working on your car. Always wear protective gear to shield yourself from harm. Here's a list of essential safety items:
- Safety glasses to protect your eyes from sparks and debris
- Gloves to safeguard your hands from sharp edges and heat
- Ear protection if you're using loud power tools
- Dust mask or respirator to avoid inhaling harmful particles
Secure loose clothing and keep a fire extinguisher nearby. Work in a well-ventilated space to avoid inhaling fumes.
Setting Up A Clean And Organized Area
Start with a clean workspace. Remove any clutter that could trip you. Arrange your tools neatly. Here's how to set up:
- Clear the area of any unnecessary items
- Place a tarp or drop cloth to catch debris
- Organize tools and materials on a workbench or table
- Ensure good lighting to see the work area clearly
- Keep a first-aid kit accessible in case of minor injuries
With these steps, your workspace will be ready for a successful rocker panel replacement.
Removing The Old Rocker Panels
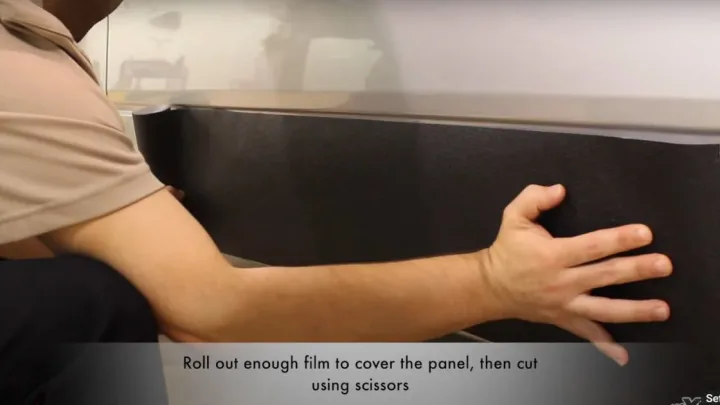
When rust or damage takes its toll, replacing rocker panels is a must for vehicle maintenance. The process begins with the removal of the old, compromised panels. This step is crucial to prepare the car for new panels. Proper removal is key to a smooth installation.
Step-by-step Removal Process
- Identify the damaged rocker panels.
- Protect surrounding areas with tape and plastic.
- Locate fasteners and weld points.
- Remove any trim or seals around the panels.
- Cut through welds using a plasma cutter or grinder.
- Detach the panel with care.
- Dispose of the old material responsibly.
Tips For Minimizing Damage To Adjacent Areas
- Use masking tape to shield paintwork.
- Apply a gentle touch when cutting.
- Opt for precision tools for tight spots.
- Work slowly to avoid bending nearby metal.
- Keep a steady hand for clean cuts.
 Preparing The Surface For New Panels
Preparing The Surface For New Panels
Before installing new rocker panels, a clean, rust-free surface is crucial. Proper preparation ensures a strong, lasting fit. Follow these steps to prepare your car for new rocker panels.
Cleaning And Rust Treatment
Begin with a thorough clean. Use a degreaser and a wire brush to remove dirt and grime. This step reveals any rust that needs addressing. Focus on areas with rust. Apply a rust converter to stabilize the metal. Allow it to dry completely. This creates a solid base for the new panels.
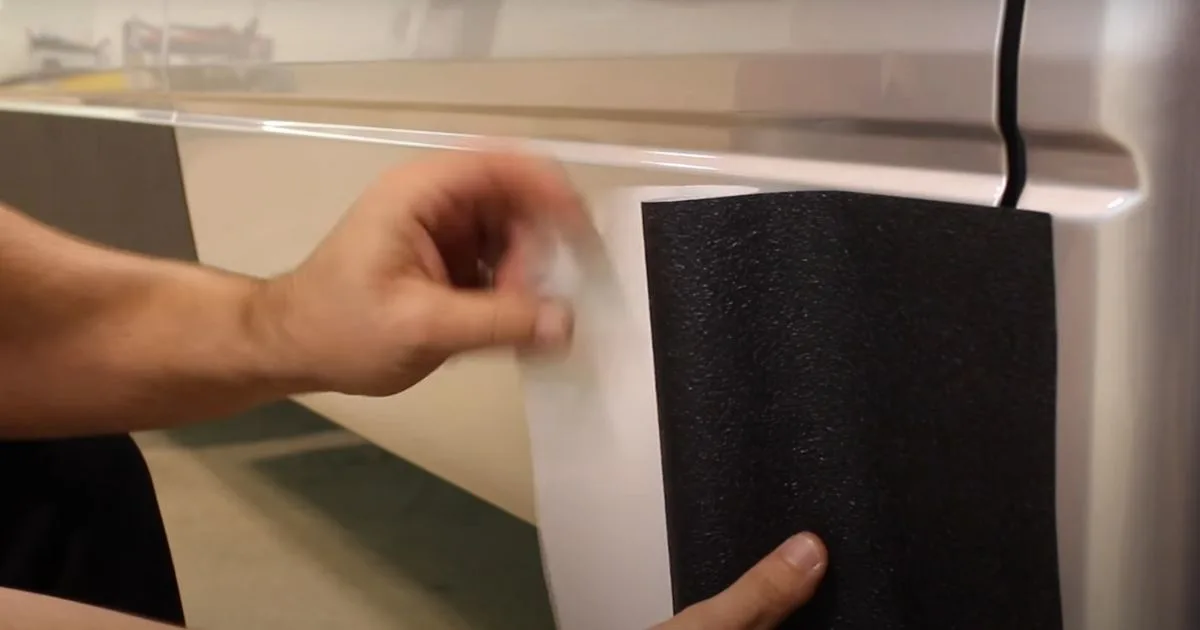
Ensuring Proper Alignment For Installation
Alignment is key for a seamless fit. Measure the area and new panels for precision. Use clamps to hold the panel in place. Check alignment with the car's lines. Make adjustments as needed. Once aligned, you're ready to weld or rivet the new panels.
Installing New Rocker Panels
Replacing old rocker panels revives your car's structural integrity. It's a task that demands precision and the right approach. The installation can be a rewarding DIY project. This guide will walk you through securing new rocker panels onto your vehicle.
Techniques For A Secure Fit
Proper alignment ensures a seamless installation. Follow these steps:
- Clean the mounting surface thoroughly.
- Test fit the new panel to check alignment.
- Mark the position with a non-permanent marker.
- Apply clamps to hold the panel in place temporarily.
Welding Vs. Adhesive Methods
| Method | Advantages | Disadvantages |
|---|---|---|
| Welding |
|
|
| Adhesive |
|
|
Choose welding for a permanent fix. It fuses the panel to the car's frame. Adhesives offer a quick solution. They work well for non-structural panels.
Finishing Touches
Once the rocker panels are securely in place, the finishing touches ensure a seamless and durable repair. Proper application of primer, paint, and waterproof sealing are crucial for a professional look and long-lasting protection.
Applying Primer And Paint
Primer prepares the new panels for painting. It also prevents rust. Here's how to apply it:
- Clean the surface with a degreaser.
- Sand the panels lightly.
- Wipe away dust with a tack cloth.
- Spray an even primer coat.
- Let it dry completely.
Next, paint matches your car's color. Follow these steps:
- Choose the right color code.
- Test the paint on a small area.
- Apply thin, even coats.
- Allow drying time between coats.
- Wait for the paint to cure.
Sealing And Waterproofing
Sealing keeps moisture out. Waterproofing prevents future rust. Both are key for panel longevity. Use these materials:
| Material | Function |
|---|---|
| Sealant | Blocks water entry |
| Waterproofing | Protects against rust |
Apply sealant along panel edges. Use a brush for even coverage. Allow it to dry. Then, apply a waterproofing agent. Choose a quality brand for best results.
 Post-installation Checklist
Post-installation Checklist
After installing new rocker panels, a checklist is key. This ensures they last long and look good. Let's dive into the important steps you should follow.
Inspecting For Quality And Durability
Quality and durability are top priorities for rocker panels. Here’s how to check:
- Look for any gaps or misalignments. These shouldn't exist.
- Check the welds. They should be smooth and strong.
- Press gently on the panels. They should feel firm.
- Ensure the sealant is applied evenly. This protects from rust.
Maintaining Your New Rocker Panels
Maintenance keeps the panels in top shape. Follow these tips:
- Clean regularly. Dirt and salt can cause rust.
- Check for scratches or dents often. Fix them quickly.
- Apply a protective coating yearly. This fights rust.
- Inspect the sealant. Reapply if it's wearing off.
Conclusion
Replacing rocker panels is a crucial repair that can extend your car's life and maintain its structural integrity. By following the steps outlined, you'll ensure a smooth, successful update to your vehicle. Remember, safety and proper technique are paramount. Drive confidently, knowing your car is in top shape with new rocker panels.
Disclosure
Some links may be affiliate links. That means we may earn a small commission at no extra cost to you.