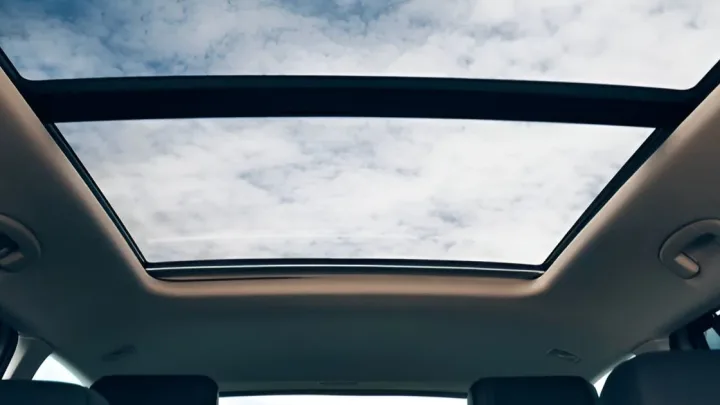
To replace the sunroof glass seal on a car, first remove the glass panel, then carefully pull off the old seal. Installing a new sunroof glass seal is a straightforward process that can significantly improve your car's interior comfort and prevent water leaks.
This task requires patience and attention to detail but can be accomplished with basic tools and a bit of know-how. A deteriorating seal not only allows water ingress but can also lead to annoying wind noise while driving. By taking the time to replace the seal, you ensure the longevity of your car's sunroof system and maintain the vehicle's overall value. This guide aims to equip car owners with the knowledge to tackle this maintenance task confidently, ensuring a watertight and quiet ride.
Introduction To Sunroof Glass Seal Replacement
Sunroof Glass Seal Replacement is crucial for car maintenance. This seal protects your car's interior from water and debris. Over time, the seal can wear out, causing leaks and potential damage to your vehicle. Understanding when to replace it and the benefits of doing so is key to keeping your car in top condition.
Signs Your Sunroof Glass Seal Needs Replacement
Several indicators suggest your sunroof seal needs attention:
- Water leaking into the cabin
- Noise from the sunroof at high speeds
- Visible cracks or damage to the seal
- Air drafts near the sunroof area
Benefits Of Timely Seal Replacement
Replacing your sunroof seal promptly offers multiple advantages:
- Prevents water damage: Keeps the interior dry
- Reduces noise: Ensures a quieter ride
- Improves air quality: Stops dust and pollen entry
- Enhances comfort: Maintains temperature control
Tools And Materials Needed For The Job
When it comes to DIY car repairs, having the right tools and materials is key. A sunroof glass seal replacement is no different. This section outlines all you need to ensure a smooth and successful job.
Essential Tools
Begin with these must-have tools:
- Screwdrivers: Both flat-head and Phillips.
- Trim removal tool: To safely remove and reattach trim pieces.
- Utility knife: For cutting away the old sealant.
- Gloves: To protect your hands from sharp edges and sealant.
- Measuring tape: To measure the sunroof and new seal.
- Rags: For cleanup and to wipe away excess sealant.
Choosing The Right Sealant on Sunroof Glass
Selecting a quality sealant ensures a lasting fix:
- UV-resistant: Prevents degradation from sunlight.
- Waterproof: Keeps moisture out.
- Flexibility: Allows for expansion and contraction.
- Non-corrosive: Won't damage your car's metal parts.
Check the manufacturer's recommendations for the best sealant for your specific car model.
With these tools and the right sealant, you're set to replace your sunroof glass seal like a pro. Stick to this guide, and enjoy a leak-free sunroof for years to come.
Preparation Steps Before Starting on Sunroof Glass
 Preparation Steps Before Starting on Sunroof Glass
Before replacing a sunroof glass seal, proper preparation is crucial. It ensures a smooth and safe repair process. Let's get ready to tackle this project with confidence.
Cleaning The Work Area
Start by cleaning the work area. A clean space prevents debris from sticking to the new seal. Use a broom to sweep away any dirt. Wipe down surfaces with a damp cloth. Make sure the car's roof is free of dust and grime.
Removing The Sunroof Glass Safely
Safety comes first when removing sunroof glass. Wear gloves to protect your hands. Use a screwdriver to loosen the screws. Carefully lift the glass out of its frame. Place the glass on a padded surface to avoid damage.
Remember, a clean and safe environment is key for a successful repair.
Removing The Old Seal
A car's sunroof glass seal ensures a watertight fit and protects the interior from the elements. Over time, seals may crack or deteriorate. Replacing the old seal is crucial to prevent leaks and wind noise. Follow these steps to remove the old seal effectively.
Related Post:
How Much to Fix Car Window Motor: Quick Cost Guide by Video
How Do You Get Green Algae off Car Window Seals: Quick Solutions!
How Much Does It Cost to Replace a Car Window Regulator: Insider Tips
How to Use Sunroof Rail on a Car: Video Instruction
How Much to Replace a Car Sunroof: Video Discussion!
Techniques For Efficient Removal on Sunroof Glass
Begin with the right tools to avoid damage. A flat-head screwdriver and a pair of pliers are essential. Gently pry the seal away from the glass edge. Work your way around the sunroof, taking care not to scratch the glass.
- Use the screwdriver to lift the seal edge.
- Grab the lifted section with pliers.
- Pull steadily to remove the seal.
- Repeat around the sunroof until fully detached.
Cleaning Residue And Preparing Surface
With the old seal removed, it's time to clean. Any residue left can affect the new seal's adhesion. Use a plastic scraper to remove larger pieces.
- Scrape off remaining adhesive.
- Wipe the surface with a solvent like rubbing alcohol.
- Ensure the surface is dry and free of debris.
Preparing the surface is vital for a good seal. Inspect the glass edge and sunroof frame. Look for any irregularities that could hinder the new seal's fit.
With these steps, your car will be ready for a new sunroof glass seal. Proper removal and preparation set the stage for a successful replacement.
Installing The New Sunroof Glass Seal
Replacing a sunroof glass seal is vital for preventing leaks. The right installation ensures a snug fit and clear skies ahead.
Applying The Sealant on Sunroof Glass
Start with a clean surface. Wipe the frame where the seal will sit.
Choose a quality sealant designed for automotive use.
Apply a thin, even bead along the channel.
Ensure no gaps or bubbles form in the sealant.
Allow the sealant to set slightly before placing the new seal.
Positioning The New Seal Correctly
The correct position of the seal ensures a watertight fit.
- Start at one corner of the sunroof.
- Press the seal firmly into the channel.
- Work your way around, maintaining even pressure.
- Trim excess seal at the end, if necessary.
- Ensure the ends meet snugly without overlapping.
After installation, check the seal by closing the sunroof and looking for any visible gaps.
Reinstalling The Sunroof Glass
After replacing your car's sunroof glass seal, the next step is reinstalling the glass. This part requires precision and care. Follow these steps to ensure the sunroof glass fits perfectly, avoiding future leaks or damage.
Ensuring Proper Alignment on Sunroof Glass
Alignment is crucial for the smooth operation of your sunroof. Here's how to align the glass properly:
- Lift the glass into the frame.
- Guide it carefully onto the tracks.
- Adjust until the glass sits evenly.
Check the edges align with the frame. Make sure the sunroof opens and closes without resistance.
Testing The Seal's Integrity
A good seal prevents water from entering the car. Test the seal integrity as follows:
- Close the sunroof completely.
- Spray water over the glass surface.
- Watch for any water seeping through.
Check the interior for wet spots. If dry, the seal is intact.
Regularly check the seal to maintain its condition. A well-sealed sunroof ensures a dry and comfortable cabin.
Post-installation Checks And Maintenance
Once you replace the sunroof glass seal on your car, your job isn't done. Next, ensure a watertight fit to protect your vehicle's interior. Regular upkeep will extend the life of the new seal. Follow these steps to test for leaks and keep the seal in top condition.
Leak Testing
Begin with a water test to check the seal's integrity. Pour water over the closed sunroof and watch for leaks. An assistant can help you spot any water seeping into the car's interior. Use a clean cloth to wipe the interior and watch for dampness.
Next, drive your car. Sometimes, wind pressure can reveal leaks not found during a static test. During the drive, listen for unusual noises. Air whistling through a gap can indicate a poor seal. If you find a leak, adjust the seal or consult a professional.
Long-term Maintenance Tips Sunroof Glass
- Inspect the seal regularly. Look for cracks, wear, or stiffness. Replace the seal immediately if you notice damage.
- Clean the seal. Use a soft cloth with mild soap and water. Avoid harsh chemicals that can degrade the rubber.
- Lubricate the seal. Use a silicone-based lubricant. This keeps the seal flexible and prevents sticking.
- Avoid sharp objects. Keep the sunroof area clear of items that can cut or puncture the seal.
- Park in the shade. UV rays can shorten the seal's life. Whenever possible, park your car out of direct sunlight.
By performing these checks and maintenance steps, your sunroof glass seal will remain effective. It will keep your car dry and quiet, no matter the weather outside.
Troubleshooting Common Issues
Troubleshooting Common Issues with sunroof glass seal replacement can be tricky. It’s not just about inserting new material. Precise steps ensure a leak-free, smoothly operating sunroof. Let's dive into common post-replacement problems and their solutions.
Dealing With Leaks After Replacement on Sunroof Glass
Even after a new seal installation, leaks can occur. Here’s how to address them:
- Inspect the seal: Ensure it sits flush against the glass and body.
- Check for gaps: Any space can let water in. Seal gaps with waterproof adhesive.
- Examine the drainage tubes: Clogs can cause backups. Clean them out thoroughly.
- Test the seal: Pour water over the sunroof. Watch for any seepage.
Adjusting The Sunroof Glass For Smooth Operation
A sunroof should glide open and shut. If it doesn’t, try these steps:
- Align the glass: It must be level for proper movement.
- Lubricate tracks: Use a silicone-based lubricant for smooth sliding.
- Calibrate the sunroof: Consult the manual to reset the sunroof’s control module.
- Check for obstructions: Remove any debris from the sunroof’s path.
Related Post:
How to Make a Sunroof in a Car: DIY Installation Guide with Video
Benefits of Privacy Glass on Cars: Enhanced Security! guide with Video
How Do I Know If My Car Windshield Washer Pump is Bad – Video In Reaction
What is the Best Way to Clean the Car Windshield: Video Tips
Conclusion
Replacing your car's sunroof glass seal is a straightforward DIY task that can save you time and money. With the right tools and instructions, you can ensure a leak-free, fresh-looking sunroof. Remember, regular maintenance goes a long way in preserving your vehicle's integrity.
Tackle this project with confidence, and enjoy the clear skies through your well-sealed sunroof!
Disclosure
Some links may be affiliate links. That means we may earn a small commission at no extra cost to you.