Testing a car voltage regulator with a multimeter is essential for car maintenance. It ensures your car's electrical system works correctly.
Have you ever noticed your car's lights flickering or battery draining quickly? These could be signs of a faulty voltage regulator. A voltage regulator controls the voltage level in your car, making sure it stays within the required range. If it malfunctions, it can lead to various electrical problems. Using a multimeter to test the voltage regulator is a straightforward process. This guide will walk you through the steps, helping you identify any issues and keep your car running smoothly. Even if you're new to car maintenance, you'll find these instructions easy to follow. Let's get started!Introduction To Voltage Regulators
A voltage regulator is a crucial component in a car's electrical system. It ensures that the voltage levels remain stable, providing consistent power to various electrical parts. Without it, your car's battery and electrical components could get damaged. Understanding how a voltage regulator works can help you diagnose electrical problems. This guide will help you test a car voltage regulator with a multimeter. By doing so, you can determine if the regulator is functioning properly or needs replacement.Role In A Car
The voltage regulator controls the output of the alternator. It ensures that the voltage stays within a safe range. This prevents the battery from overcharging or undercharging. It also protects the car's electrical components from damage caused by voltage fluctuations. In modern cars, the voltage regulator is often integrated into the alternator. In older models, it is a separate component. Either way, its role is critical for the smooth operation of your vehicle.Common Symptoms Of Failure
Several symptoms can indicate a failing voltage regulator. One common sign is a dead battery. If the battery frequently dies, the voltage regulator might be faulty. Another symptom is dim or flickering lights. This can happen if the voltage is not being regulated properly. Other signs include electrical components that work intermittently. The car might also experience starting problems. A failing voltage regulator can cause these issues, leading to frustration and potential damage to your car.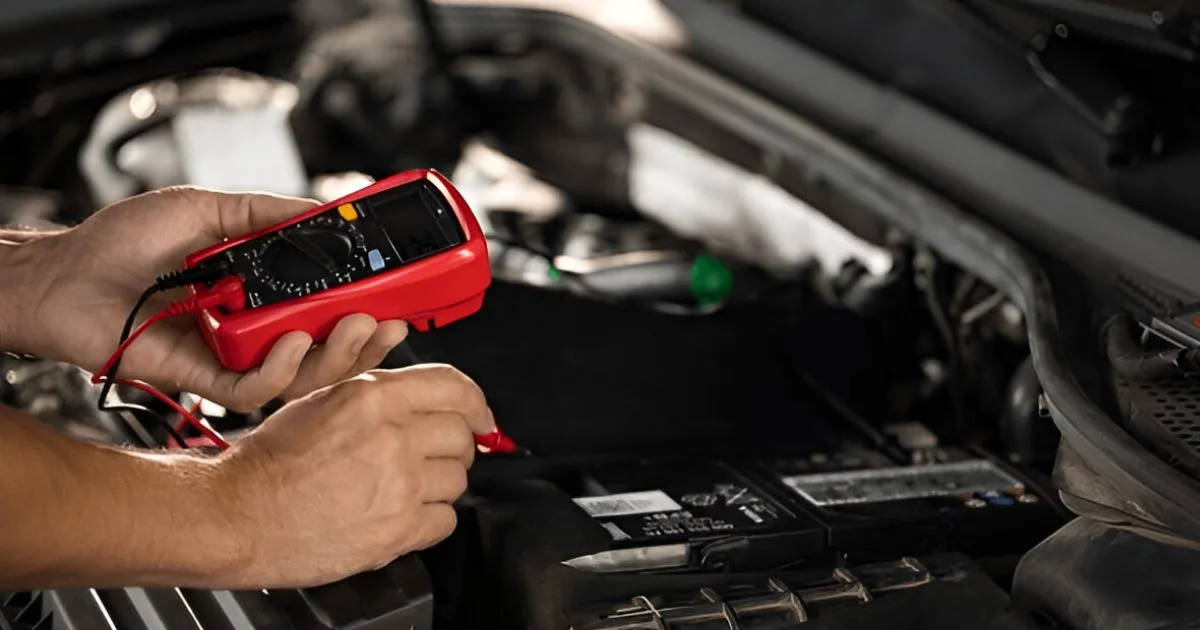 Tools Needed
Tools Needed
Testing a car voltage regulator with a multimeter is an essential task for maintaining your vehicle's electrical system. To complete this job effectively, you'll need some basic tools. These tools help ensure accurate measurements and a smooth testing process. Let's look at the essential and optional tools required for this task.Essential Tools
The primary tool for this job is a multimeter. A digital multimeter is preferred for its accuracy and ease of use. It should have a voltage measurement range that covers the expected output of the car's voltage regulator. You will also need a pair of insulated gloves. These gloves protect you from electric shocks. Safety is paramount when working with electrical systems. A set of basic hand tools is necessary. This includes screwdrivers and pliers. These tools help you access the voltage regulator and make any necessary connections or adjustments.Optional Tools
An automotive test light can be useful. It helps you verify the presence of voltage in certain parts of the circuit. This tool is not essential but can make the job easier. A wire brush or contact cleaner is helpful for cleaning battery terminals and connections. Clean connections ensure accurate readings and prevent false results. ```Safety Precautions
Testing a car voltage regulator with a multimeter ensures your vehicle's electrical system works correctly. Before starting, follow some essential safety precautions. These steps protect you and your car during the process.Personal Safety
Wear protective gloves to avoid electrical shocks. Safety glasses protect your eyes from sparks. Ensure the car is off to prevent accidental starts. Work in a well-ventilated area. This prevents inhaling harmful fumes.Protecting The Car
Disconnect the battery to avoid short circuits. Use the correct multimeter settings to prevent damage. Avoid touching metal parts with the multimeter probes. This prevents accidental sparks. Ensure all connections are secure before starting the test. Loose connections can lead to inaccurate readings. Follow the car's manual for specific instructions. This ensures you're following the correct procedure.Locating The Voltage Regulator
If you’re new to car maintenance, the idea of testing a car voltage regulator with a multimeter might sound like rocket science. But don’t worry, it’s simpler than you think. The first step is locating the voltage regulator. This component can be found in different places depending on your vehicle model. Typically, it’s either under the hood or inside the alternator. Let’s dive deeper into both locations.Under The Hood
Pop open the hood and take a look around. You might need to do a bit of a treasure hunt here. The voltage regulator could be mounted on the firewall, the fender, or near the battery. It’s usually a small box with several wires coming out of it. If you’re unsure, your car’s manual can be a great guide. Here’s a quick checklist to help you out:- Check near the battery.
- Look on the firewall.
- Inspect the fender area.
Inside The Alternator
Sometimes, the voltage regulator is sneaky and hides inside the alternator. This can make things a bit trickier. To locate it, you’ll need to remove the alternator from the engine. It’s not as daunting as it sounds. With a bit of patience and the right tools, you can do it. Here’s a step-by-step guide:- Disconnect the battery to ensure safety.
- Remove the serpentine belt from the alternator.
- Unbolt the alternator from its mounting bracket.
- Disconnect the wiring harness from the alternator.
- Carefully take the alternator out.
 Preparing The Multimeter
Preparing The Multimeter
Before testing the car voltage regulator, you need to prepare the multimeter. This step ensures accurate and reliable results. A well-prepared multimeter helps avoid incorrect readings. Follow these simple steps to get your multimeter ready.Setting To Dc Voltage
First, set the multimeter to DC voltage. Most car systems use DC voltage. Look for a symbol with a V and straight lines. Turn the dial to this setting. This prepares the multimeter to measure the car's electrical system.Checking The Probes
Now, check the multimeter probes. Ensure they are in good condition. Look for any signs of damage. Damaged probes can give false readings. Next, connect the black probe to the COM port. Connect the red probe to the VΩmA port. This is the standard setup for most multimeters. Secure connections ensure accurate results.Testing The Voltage Output
Testing the voltage output of a car voltage regulator is an essential step. It ensures that your vehicle's electrical system works correctly. The voltage regulator controls the alternator's output, preventing overcharging or undercharging. This guide will help you test the voltage output using a multimeter.Connecting The Multimeter
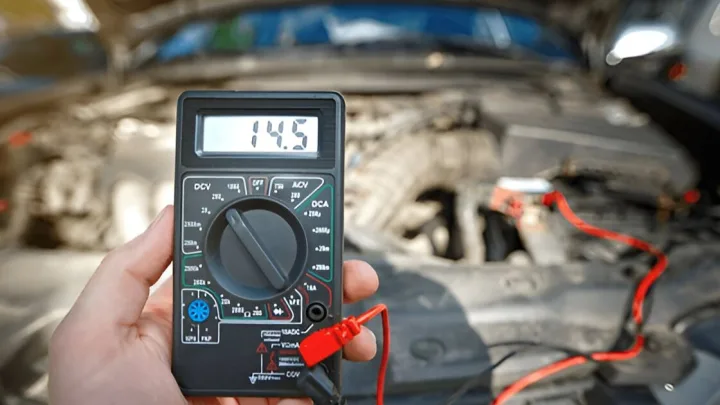
Start by setting your multimeter to the DC voltage setting. Locate the car battery and the voltage regulator. Connect the multimeter's red lead to the battery's positive terminal. Attach the black lead to the battery's negative terminal. Turn on the car's ignition but do not start the engine. Observe the multimeter reading. It should display around 12.6 volts for a fully charged battery.Interpreting The Readings
Next, start the car and let it idle. Check the multimeter reading again. A healthy voltage regulator should produce a reading between 13.8 and 14.5 volts. If the reading is outside this range, the regulator may be faulty. If the voltage is too high, it indicates overcharging. This can damage the battery and other electrical components. If the voltage is too low, it means undercharging. This will lead to a drained battery over time. Inconsistent readings can also signal a problem. Ensure all connections are secure and free from corrosion. Repeat the test to confirm the results.Troubleshooting Common Issues
Testing a car voltage regulator with a multimeter can seem like a daunting task, especially if you're new to the world of car maintenance. However, identifying and troubleshooting common issues can save you time and money. Here, we'll walk you through the basics of resolving some of the most frequent problems you might encounter.Low Voltage Reading
One of the most common issues you might face is a low voltage reading. This typically indicates that the voltage regulator is not supplying enough power to the battery and the car's electrical system. Here's a step-by-step guide to troubleshooting this problem:- Check the Battery: First, ensure that your car battery is in good condition. A weak or dead battery can result in a low voltage reading. Use your multimeter to measure the battery voltage. A fully charged battery should read about 12.6 volts.
- Inspect the Connections: Loose or corroded connections can cause voltage drops. Examine the battery terminals and the connections to the voltage regulator. Clean any corrosion and tighten any loose connections.
- Measure Voltage Output: With the car engine running, measure the voltage at the battery terminals using the multimeter. It should read between 13.8 and 14.5 volts. If it's lower, the voltage regulator might be faulty.
- Replace the Voltage Regulator: If all else fails, you may need to replace the voltage regulator. Consult your car’s manual for specific instructions on how to do this.
Fluctuating Voltage
Another issue you might encounter is fluctuating voltage. This can lead to inconsistent performance of your car’s electrical components and can be quite frustrating. Let's troubleshoot this issue:- Check for Loose Connections: Just like with low voltage, loose or corroded connections can cause voltage fluctuations. Ensure all connections are secure and clean.
- Inspect the Alternator Belt: A worn or loose alternator belt can cause the voltage to fluctuate. Check the belt for any signs of wear and ensure it has the proper tension.
- Test the Alternator: Sometimes, the alternator itself can be the culprit. Use the multimeter to check the alternator output. It should be consistent and within the range specified by your car manufacturer.
- Observe Electrical Loads: Turn on various electrical components in your car (lights, radio, air conditioning) and observe the multimeter reading. Significant drops in voltage might indicate an issue with the voltage regulator or alternator.
- Consult a Professional: If you're unable to pinpoint the problem, it might be time to consult a professional mechanic. They have the tools and expertise to diagnose and fix more complex issues.
 Post-test Steps
Post-test Steps
Alright, you've tested your car's voltage regulator with a multimeter. Now what? It's time to take a few more steps to ensure everything is in tip-top shape. This is crucial because understanding your test results can help you decide what to do next. Let's dive into the post-test steps.Recording Results
First things first, record your results. Write down the voltage readings you got during your test. This isn't just busy work; it's essential. Here’s why:- Helps you compare with standard values later.
- Useful for any mechanic you might consult.
- Keeps a record for future reference.
Next Steps If Faulty
So, what if your voltage regulator isn’t working correctly? Don’t panic! Here are some next steps you can take:- Double-check your connections: Sometimes, a loose wire can mess things up. Ensure everything is connected properly.
- Consult the manual: Your car’s manual might have specific instructions for dealing with a faulty voltage regulator.
- Contact a professional: If you're unsure, it’s okay to call in an expert. Better safe than sorry!
Conclusion
Testing a car voltage regulator with a multimeter is easy. Follow the steps carefully to ensure accurate results. Regular checks can prevent bigger issues. Maintaining your car's electrical system saves money and time. Always keep your multimeter in good condition. This ensures reliable readings. Practice makes you more confident in using the tool. Remember, safety first when working with car electronics. Happy testing and safe driving!Disclosure
Some links may be affiliate links. That means we may earn a small commission at no extra cost to you.